Python is an interpreted, object-oriented, high-level programming language that is widely used by network engineers. Python is meant to be a simple and easy to learn language that makes use of high-level data structures for application development, scripting, and gluing scripts together. Python 3 is available by default on Linux distributions.
Before starting, let's set up a Python virtual environment as a best practice. Python virtual environments enable installation of specific packages into an isolated environment for development of your application or program. This isolation ensures that your packages and requirements will not affect another application or program's packages or requirements. For example, you may require one version of a package or software development kit (SDK), while a different application or program requires a different version of the same package or SDK; this is where virtual environments are beneficial.
We will leverage Pyenv for managing multiple Python versions and virtual environments. Pyenv not only lets you create and manage virtual environments, but also, different versions of Python if desired. You'll use pyenv to install Python 3 and then create a virtual environment for this lab.
The pyenv installer tool will be leveraged to ease the install of pyenv. The alternative is to clone the pyenv repository and install it from source.
curl https://pyenv.run | bash
After installing pyenv, modify your .bashrc file and source the .bashrc file so that path changes take effect.
The following command will append the PATH variable and pyenv eval commands.
cat <<'EOF' >> ~/.bashrc
export PATH="$HOME/.pyenv/bin:$PATH"
eval "$(pyenv init --path)" # This only sets up the path stuff.
eval "$(pyenv init -)" # This makes pyenv work in the shell.
eval "$(pyenv virtualenv-init -)" # Enabling virtualenv so it works natively.
EOF
With your .bashrc file updated, you can source it to set the terminal variables and be ready to install
a Python version.
. ~/.bashrc
Over the last several years, zsh has become a popular replacement for bash.
If you are using zsh in your own environment, these pyenv commands will need to be placed in your .zshrc file.
To keep up with the latest versions of Python released, you may need to update the tool by issuing the following command:
pyenv update
The command to install a version of Python is pyenv install {python_version}.
Install Python 3.11.14 by either typing or copying the command below into your VSCode Terminal window:
pyenv install 3.11.14
Install output:
    Downloading Python-3.11.14.tar.xz...
    -> https://www.python.org/ftp/python/3.11.14/Python-3.11.14.tar.xz
    Installing Python-3.11.14...
    Installed Python-3.11.14 to /home/cisco/.pyenv/versions/3.11.14
You can verify the Python versions you have installed with pyenv using pyenv versions.
Check your installed versions by either typing or copying the command below into your VSCode Terminal window
and look for 3.11.14 in the output.
pyenv versions
Versions output:
    * system (set by /home/cisco/.pyenv/version)
    3.11.14
To begin creating a virtual environment or virtualenv, create a directory and change into that directory. Do this by either typing or copying the command below into your VSCode Terminal window:
cd /home/pod14/workspace/
mkdir nxapilab
cd nxapilab
The command to create your virtual environment using pyenv is pyenv virtualenv {python_version} {virtualenv_name}.
Create a virtual environment called nxapilab using the 3.11.14 Python version you previously installed.
Do this by either typing or copying the command below into your VSCode Terminal window:
pyenv virtualenv 3.11.14 nxapilab
Next, use the pyenv local {virtualenv_name} to set the virtualenv for the project. This will create a
.python-version file within the current directory, thus the reason we went ahead and changed directory into the project directory.
This file is powerful as it will handle activating and deactivating the virtualenv as you move in and out of the project directory automatically,
otherwise, this is an action you would need to perform manually or by some other automated means.
Do this by either typing or copying the command below into your VSCode Terminal window:
pyenv local nxapilab
And with that you have created and activated the virtual environment you will use during this lab.
Notice that it placed you inside the virtual environment after creating it. The
important part is the way the SHELL looks like while you are inside
the virtual environment. Notice the (nxapilab) at the start of the line; that indicates the virtualenv is active.
What active virtualenv looks like:
(nxapilab) pod14 ~/workspace/nxapilab $:
Go ahead and upgrade pip to the latest version.
pip install --upgrade pip==26.0.1
It is important to make sure you only have two initial packages installed in your virtual environment. You will install more packages later. For now only pip and setuptools should be installed.
pip list
pip list output:
    Package    Version
    ---------- -------
    pip        26.0.1
Pip install the requests library for use later in this lab. Do this by either typing or copying the command below into your VSCode Terminal window:
pip install requests==2.32.5
Verify the requests package is installed in your virtualenv.
pip freeze
pip freeze output:
    certifi==2026.1.4
    charset-normalizer==3.4.4
    idna==3.11
    requests==2.32.5
    urllib3==2.6.3
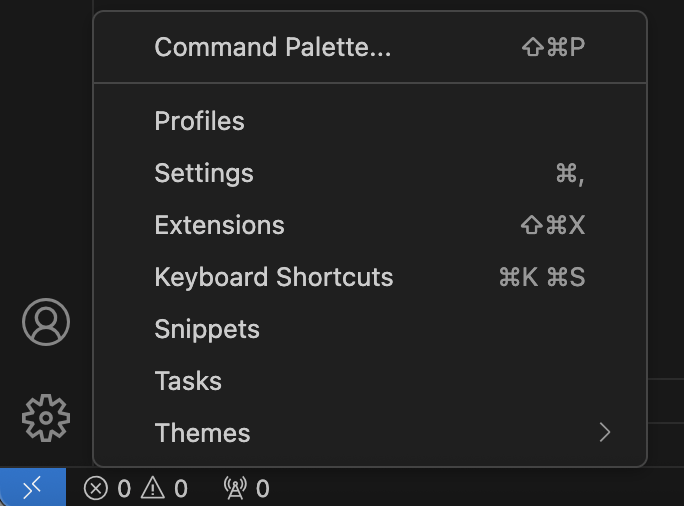
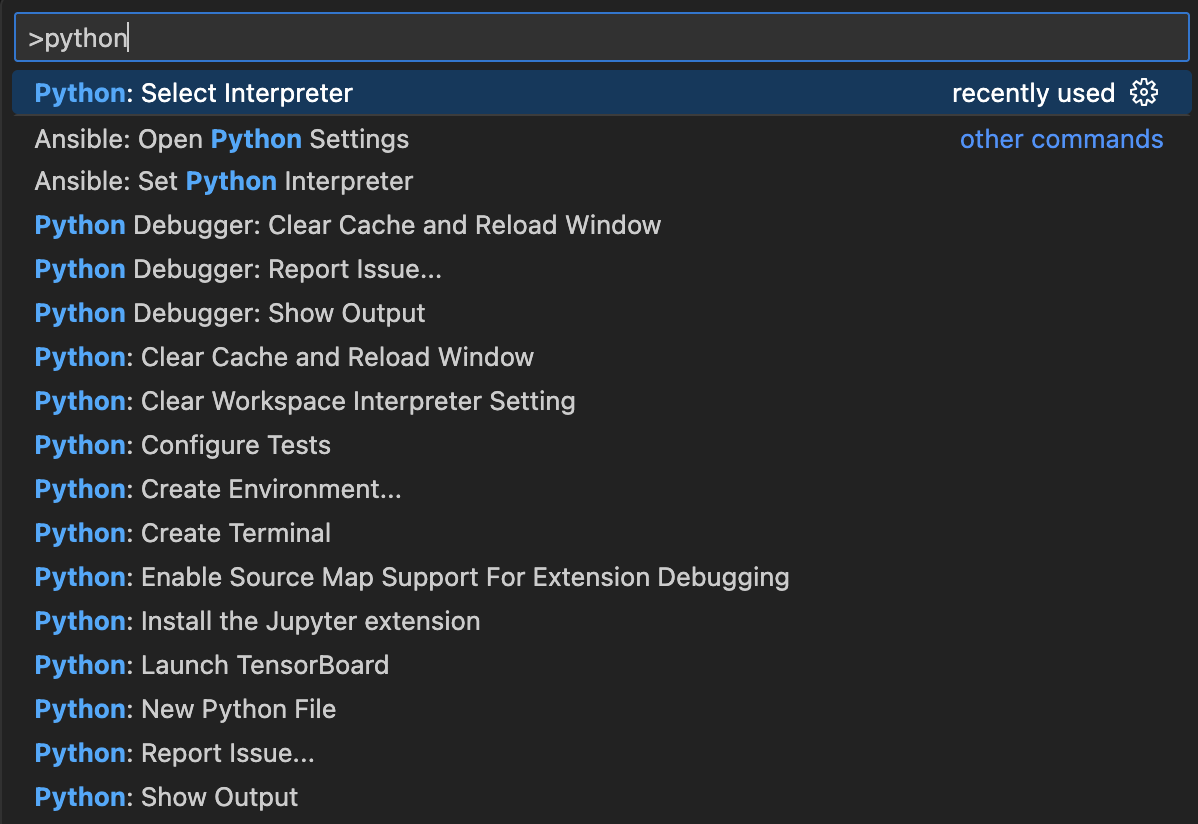
One key element when using a virtual environment is to make sure that the IDE is configured to use the virtual environment. This is done by configuring the Python interpreter to use the virtual environment. In Visual Studio Code you can do this by selecting the interpreter from the command palette.
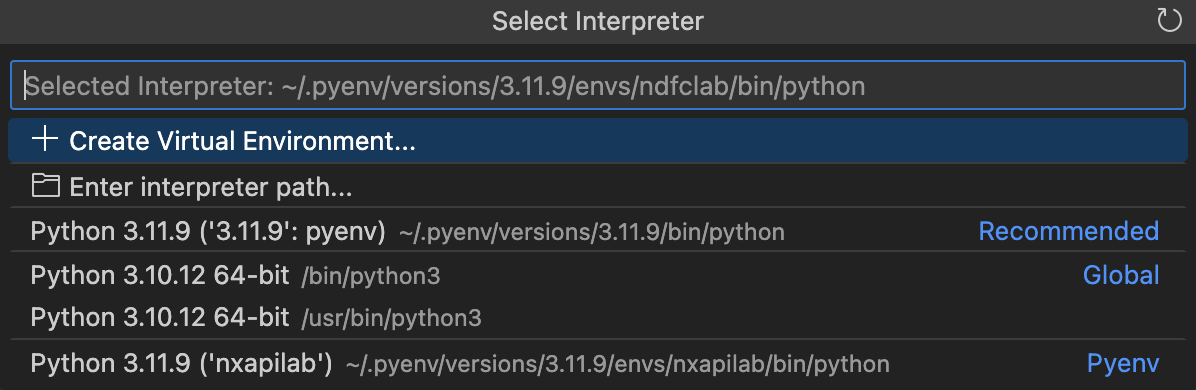
python
Python 3.11.14 ('nxapilab') ~/.pyenv/versions/3.11.14/envs/nxapilab/bin/python
Continue to the next section for a detailed overview of NX-API.